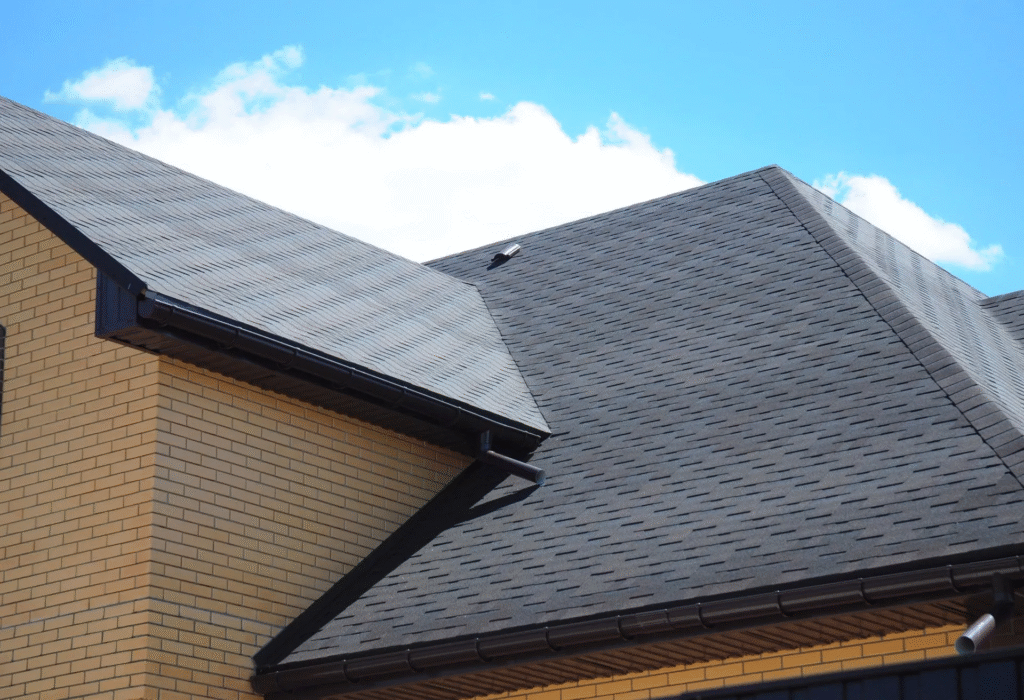

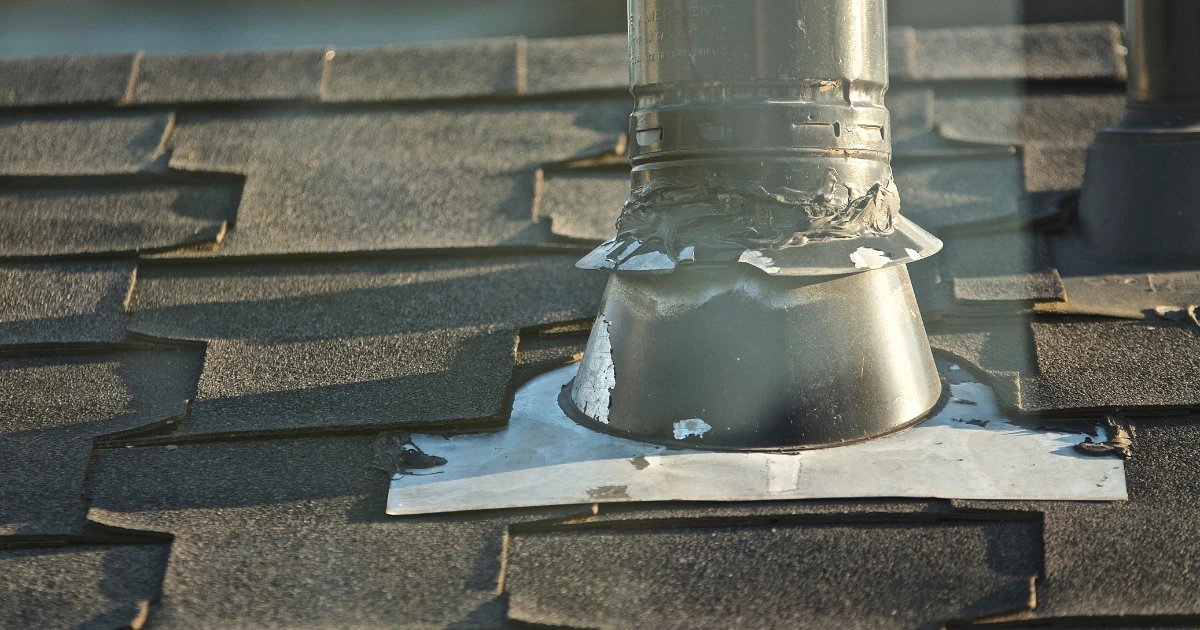
Water stains on your ceiling, mold growth, or unexpected roof repair bills are often signs of a hidden roof vent leaking problem. What starts as a small drip can quickly lead to serious water damage inside your home if left untreated. You may first notice a musty smell, damp ceiling spots, or peeling paint, but behind the scenes, moisture can spread into insulation, drywall, and wooden framing. Without prompt attention, a leaking roof vent can cause costly structural damage and reduce the overall lifespan of your roof.
Many homeowners assume the leak is coming directly from the roof vent itself. However, the real cause is often damaged flashing, worn-out sealant, cracked vent boots, improper installation, or debris blocking the vent cover. Heavy rain, strong winds, changing temperatures, and natural roof aging can make these weak points worse, allowing water to penetrate your roofing system. Ignoring even a minor leak can lead to mold growth, poor indoor air quality, and expensive repairs.
Finding the exact source of the leak is the first step toward protecting your home and avoiding further damage. A professional roof inspection can detect hidden issues before they become major problems. Fixing a roof vent leaking issue early helps extend your roof’s lifespan, prevent costly water damage, improve your home’s safety, and save you from unexpected repair expenses in the future.
Why Roof Vent Leaking Should Not Be Ignored
Roofing damage caused by a leaking roof vent is often underestimated, but it can lead to serious problems over time. Roof vent leaks can cause steady damage as water intrusion affects insulation, weakens wood, and encourages mold growth. If left untreated, small leaks turn into costly repairs.
When moisture spreads inside hidden roof layers, it can also reduce the energy efficiency of your home and create long-term odor problems. In severe cases, structural components may begin to rot, leading to safety risks and expensive reconstruction work that could have been avoided with early attention.
Fixing the issue early helps protect your home structure and prevents repeated maintenance problems in the future. Early repairs also help preserve your roof’s lifespan, prevent interior water stains, protect electrical systems from moisture exposure, and reduce the risk of extensive damage during future storms or prolonged periods of heavy rainfall.
Main Reasons Behind Roof Vent Leaks 
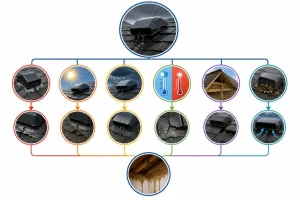
Roof vent leaks usually happen due to wear, weather exposure, or poor installation. Over time, materials weaken and small gaps form around the vent area.
Constant exposure to sun, rain, and temperature changes can also cause sealants to dry out and crack. In some cases, shifting roof structures or blocked vent pathways increase pressure around weak points, making leaks more likely during heavy rainfall or storms. These openings allow water to enter during rain. Understanding the root causes helps you fix the issue properly instead of relying on temporary solutions.
Cracked or Worn Vent Boot
The vent boot seals the pipe where it exits the roof. Over time, sunlight and heat cause rubber to crack or dry out. Once damaged, water can easily pass through the gap and follow the pipe downward into your attic. In many cases, the damage is not visible from the ground, making it harder for homeowners to detect early. Small cracks can slowly widen during seasonal temperature changes, allowing more water to enter during each rainfall. This repeated exposure often leads to insulation damage and ceiling stains if not repaired quickly.
Damaged Flashing Around Vent
Flashing protects the edges around the roof vent by creating a watertight seal where the vent meets the roofing material. If it becomes loose, bent, cracked, or rusted, water can easily slip underneath and enter your home. Even a small gap can cause leaks, especially during heavy rain or when strong winds drive water toward the vent. Over time, rust and corrosion weaken the flashing, reducing its ability to keep moisture out. Debris buildup around the flashing can also trap water, increasing the risk of seepage into the roof structure. Regular inspections and prompt flashing repairs help prevent roof vent leaking and protect your home from long-term water damage.
Poor Installation or Sealing
Improper installation often leads to early leaks. If the vent or flashing was not aligned or sealed correctly, gaps remain. These weak points allow water to enter easily and cause problems much sooner than expected. In some cases, low-quality sealants or rushed workmanship fail to provide long-term protection. Even slight misalignment can redirect water flow into vulnerable areas, making the roof more prone to recurring leaks after heavy rainfall or strong winds.
Cracks in the Vent Cover
Plastic or metal vent covers can crack over time. Weather changes and sun exposure weaken the material. Once cracked, rainwater can enter directly and move into the attic space, causing hidden damage. These cracks often start small but expand gradually due to thermal expansion and contraction. Wind-driven rain can worsen the situation by forcing water through even tiny openings. If ignored, this can lead to mold growth, insulation damage, and reduced indoor air quality over time.
Step-by-Step Points to Check the Problem 
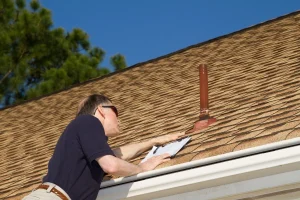
Inspect ceiling area below the vent location carefully: Look for stains, damp patches, or peeling paint around the ceiling area. These signs often appear first and help narrow down the possible leak zone before moving to the attic for deeper inspection.
Check attic for moisture or light around vent pipe: Go into the attic and examine the vent pipe closely. Look for wet insulation, mold, or small light gaps. These signs clearly indicate where water may be entering from the roof surface.
Examine vent boot condition for cracks or damage: Carefully inspect the rubber boot around the vent pipe. Cracks, splits, or dryness indicate failure. Even small openings can allow water to pass through during rain and cause interior damage over time.
Inspect flashing edges for gaps or loose sections: Check the metal flashing around the vent. Look for lifted edges, rust, or missing sealant. These weak points often allow water to seep underneath and create leaks inside your home.
Look for debris buildup around the vent base area: Leaves and dirt can collect around the vent. This blocks water flow and causes pooling. Standing water increases the chance of leakage by forcing water into small gaps around the vent.
Test area using controlled water flow with a hose: Use a garden hose to spray water around the vent area. Have someone inside observe any leaks. This helps confirm the exact entry point without waiting for natural rainfall conditions.
Check surrounding shingles for cracks or missing pieces: Inspect nearby shingles for damage. Cracked or missing shingles near the vent can allow water to travel toward the vent opening, making it appear like the vent is leaking.
Observe leak behavior during light and heavy rain: Pay attention to when the leak appears. Light rain helps identify entry points clearly, while heavy rain may spread water. Observing patterns helps you understand the true cause.
Basic Tools You May Need
A few simple tools make inspection easier and safer. Using the right items helps you check both interior and exterior areas without missing important signs during the process.
- Flashlight for attic inspection and dark corners.
- Ladder for safe and stable roof access.
- Garden hose for controlled water testing process.
- Chalk to mark suspected leak areas clearly.
- Gloves to protect hands during inspection work.
- Camera to capture and review damage details.
- Notebook to record findings during inspection.
- Moisture meter to detect hidden dampness areas.
How Weather Affects Roof Vent Leaks
| Weather Condition | How It Affects Roof Vent Leaks |
|---|---|
| Rain | Rain makes roof vent leaks easier to detect by allowing water to enter through damaged flashing, cracked sealant, or gaps around the vent. |
| Strong Wind | High winds can drive rainwater beneath flashing and into small openings that normally remain dry, causing leaks to develop or worsen. |
| Sunlight & Heat | Prolonged sun exposure causes roofing materials and sealants to dry out, crack, and deteriorate, increasing the risk of roof vent leaks. |
| Temperature Changes | Daily expansion and contraction of roofing materials create small gaps around the vent, allowing water to penetrate over time. |
| Storms | Heavy storms place extra stress on flashing and vent seals, often turning minor weaknesses into significant roof leaks. |
| Snow & Ice | Snow and ice can build up around roof vents. As they melt, water may seep into hidden gaps and cause interior water damage. |
| Repeated Weather Cycles | Continuous exposure to changing weather gradually weakens flashing, sealants, and roofing materials, making roof vent leaks more likely. |
| Best Time for Inspection | Inspecting your roof during or immediately after rainfall helps identify active leaks, while sunny conditions make cracks and damaged areas easier to spot. |
Common Mistakes to Avoid During Inspection 
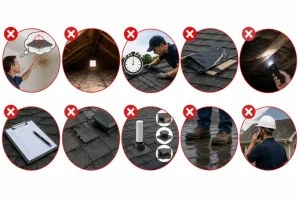
Many people assume the leak is directly above the stain, which is often incorrect. Skipping attic inspection is another common mistake. Rushing the process or ignoring small signs leads to wrong conclusions.
Another frequent error is using temporary fixes without identifying the real source of the problem, which only hides the leak instead of solving it. Poor lighting during inspection can also cause missed damage in hard-to-see areas.
Careful and step-by-step checking gives better results. Not documenting findings or rechecking areas can also lead to missed problems and repeated leaks. Keeping a proper record helps ensure accurate repairs and prevents future issues. Understanding the common types of roof repairs can also help homeowners recognize whether a leaking roof vent requires simple resealing, flashing replacement, or a more extensive repair. Walking on a wet or damaged roof without proper safety precautions is another mistake that can result in injury or additional roof damage. Always inspect carefully, use appropriate safety equipment, and consult a roofing professional if the source of the roof vent leak cannot be identified with confidence.
Important Points to Remember
- Always check attic before assuming roof surface damage.
- Follow water trail instead of guessing leak source.
- Inspect vent flashing and seals very carefully.
- Avoid walking on wet roof during inspection.
- Small cracks can lead to bigger hidden damage.
- Always inspect after storms or heavy wind conditions.
- Use controlled water testing only when necessary.
- Replace damaged vent parts instead of temporary fixes.
- Document findings to avoid confusion during repair.
- Call professional if problem becomes complex or unsafe.
Roof Vent Leak Detection Methods Comparison
Different methods can be used to identify a leaking roof vent. Each method has its own benefits depending on the situation.
Some are quick and simple, while others require more time and effort. Choosing the right method helps improve accuracy and avoid unnecessary repairs.
| Method | Best Use Case | Accuracy | Time Required | Notes |
| Visual Inspection | Early visible signs | Medium | Low | Good starting point |
| Attic Inspection | Hidden leak tracing | High | Medium | Very reliable |
| Water Testing | Confirm exact entry point | High | Medium | Needs two people |
| Professional Check | Complex leak issues | Very High | High | Most accurate |
When Roof Vent Leaks Are Hard to Detect
Roof vent leaks can be difficult to trace because water rarely travels straight down. It often moves along beams or insulation before becoming visible. This movement can mislead you and make the leak appear in the wrong place.
Water Travels Away from Entry Point: Water can move sideways along wood or insulation before dripping down. This makes the visible leak location different from the actual entry point, which creates confusion during inspection.
Hidden Damage Under Roofing Materials: Sometimes damage exists under shingles or flashing. These hidden issues are not visible from the surface, making it harder to identify the real cause without careful inspection.
Wind-Driven Rain Changes Water Direction: Strong winds push rain into small gaps. This creates temporary leaks that may not appear during normal conditions, making the problem harder to trace accurately.
Key Areas You Should Always Check 
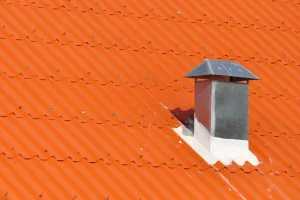
- Around the vent base where flashing meets the roof surface.
- Rubber boot area covering vent pipe entry point.
- Nearby shingles for cracks or missing sections.
- Attic insulation directly below vent pipe location.
- Roof valleys where water naturally collects and flows.
- Edges of flashing where gaps can easily form.
- Vent cover surface for cracks or visible damage.
- Areas with repeated water stains inside home.
When You Should Repair or Replace the Vent
Deciding between repair and replacement depends on the condition of the vent. Minor cracks or loose seals can be fixed quickly. However, if the vent boot is badly damaged or the vent is cracked, replacement is the better long-term solution.
In many cases, patch repairs may stop the leak temporarily, but they do not address deeper wear or hidden damage around the roofing layers. If the surrounding flashing or roof decking is also affected, replacing the entire vent assembly ensures better durability and prevents recurring water intrusion.
Repeated leaks, aging materials, or visible wear are clear signs that a full replacement will prevent future issues. Choosing replacement at the right time also reduces long-term repair costs and protects the attic from moisture-related damage.
When to Call a Professional Roofer
Some situations require expert help. If the roof is steep, the damage is widespread, or the leak continues after repairs, it is safer to call a professional. They have the right tools and experience to handle complex issues properly. Professionals can also identify hidden problems that are not easily visible, such as damaged underlayment or weakened structural areas around the vent. Attempting repairs without proper knowledge can sometimes worsen the issue or create safety risks.
If water stains keep reappearing or multiple vent areas are affected, a trained roofer can provide a complete inspection and ensure the problem is fully resolved instead of temporarily hidden.
Advanced Tips for Accurate Leak Detection 
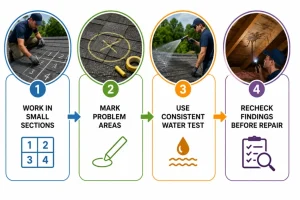
Careful inspection and patience are key to finding the exact source of a leak. Using simple techniques correctly can improve accuracy and prevent wrong repairs that waste time and effort.
Work in Small Sections During Inspection: Divide the roof into sections and inspect each part carefully. This method helps avoid missing small damage areas and makes it easier to isolate the exact leak source.
Mark Problem Areas Clearly: Use chalk or tape to mark suspected areas. This helps you track locations during inspection and prevents confusion when checking multiple spots on the roof.
Use Consistent Water Testing Method: Apply water slowly and in controlled sections. This prevents overlapping results and helps identify the exact entry point without spreading water across large areas.
Recheck Findings Before Repair: Always confirm the leak source before fixing it. Double-checking helps avoid mistakes and ensures you are repairing the correct problem area.
Why Regular Inspection Matters
Regular roof inspection helps detect small problems before they become serious. Checking vents, flashing, and surrounding areas keeps your roof in good condition. It also reduces repair costs and prevents sudden leaks during heavy rain or storms.
Early inspection also helps homeowners identify hidden moisture buildup that may not be visible from inside the house. This is especially important around vent areas where small cracks or seal failures often develop over time. Catching these issues early can extend the lifespan of roofing materials and maintain the overall strength of the roof system.
Frequently Asked Questions
Why does my roof vent leak during heavy rain only?
Heavy rain combined with strong wind can force water into small gaps around the roof vent. These openings may stay sealed during light rain, but under pressure, water gets pushed inside. This creates leaks that appear only during storms, making the problem harder to detect in normal weather conditions.
This usually happens because minor weaknesses in flashing or seals become exposed when water flow and wind pressure increase at the same time. Even a tiny gap that seems harmless in normal weather can act like an entry point during storms. Repeated exposure can also widen these gaps over time, making the issue worse in future rain events.
Can I fix a leaking roof vent myself?
Yes, you can fix minor roof vent leaks yourself if the issue is small and easy to reach. Simple problems like cracked sealant or loose nails can be repaired using basic tools. However, if the vent is damaged or the roof is steep, calling a professional is safer.
Before attempting repairs, it is important to inspect the surrounding area carefully to identify the exact source of the leak. Using the wrong materials or applying temporary patches without proper sealing can lead to repeated problems. Safety should always be the priority, especially when working at height or on slippery surfaces.
How long does a roof vent typically last?
Roof vents usually last between 10 and 20 years, depending on the material used and weather conditions in your area. Regular inspection and timely maintenance can extend their lifespan and help prevent early damage or leaks.
Metal vents often last longer than plastic ones, but both can degrade faster in extreme heat, heavy rainfall, or salty coastal air. Sealants around the vent may also wear out sooner than the vent itself, requiring periodic replacement to maintain proper protection against water intrusion.
Is a leaking vent a serious problem?
Yes, a leaking roof vent is a serious issue if ignored over time. Even a small leak can lead to mold growth, damaged insulation, and weakened wooden structures. Fixing the problem early helps prevent costly repairs later. Moisture buildup inside the attic can also reduce air quality and create long-term structural risks that are expensive to repair. In severe cases, it may spread to ceilings and walls, affecting multiple parts of the home. Early action ensures the damage remains limited and manageable.
Final Thoughts
A leaking roof vent is often caused by small issues like cracked boots, loose flashing, or poor installation. While it may seem minor, ignoring it can lead to serious damage over time. The key is to identify the exact cause instead of guessing.
Water intrusion tends to spread quietly, making early detection extremely important. Even a small delay in repair can increase costs significantly and affect other parts of the roofing system. Proper understanding of the issue helps homeowners make better repair decisions.
By following a step-by-step inspection and paying attention to early signs, you can fix the problem correctly and prevent future leaks. Regular maintenance and timely repairs will keep your roof protected for years to come. Scheduling routine roof inspections, especially after heavy storms or seasonal weather changes, can help detect roof vent leaking before it becomes a major problem. Taking preventive action not only extends the life of your roofing system but also protects your home’s value, comfort, and overall structural integrity.