
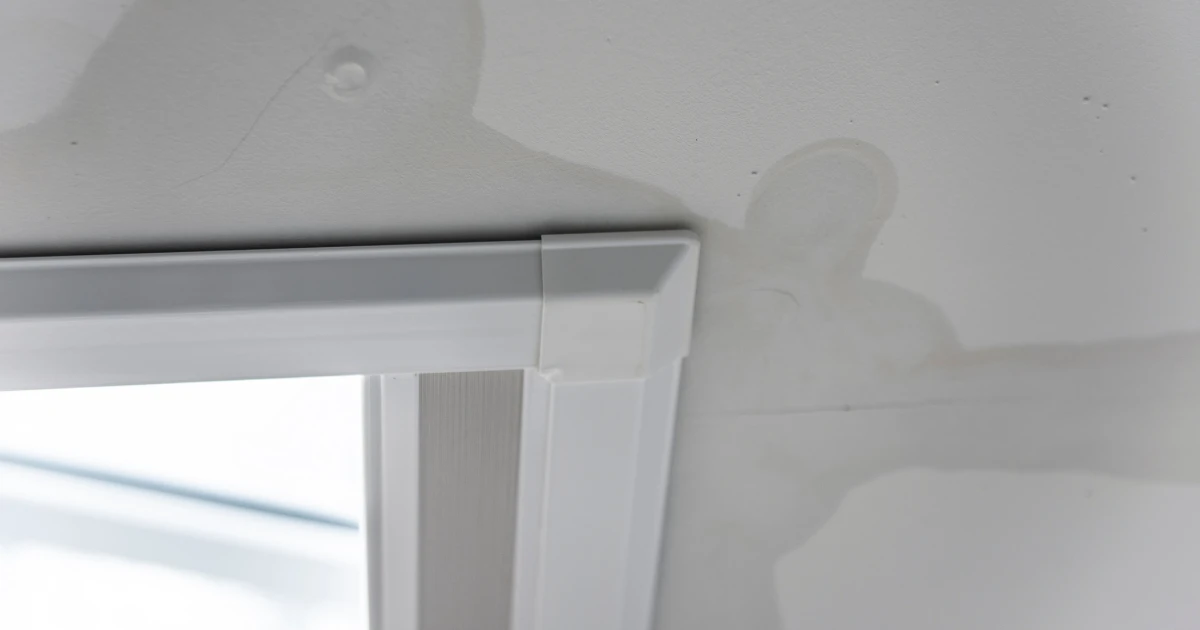
When heavy rain and strong winds arrive, your skylight should let in natural light, not water. If you notice dripping, ceiling stains, or moisture around the frame, you’re likely dealing with a skylight leaking during storms. Storm-driven rain can force water beneath damaged flashing, while clogged drainage channels, worn seals, or small cracks allow moisture to enter your home. Even minor issues can quickly become major leaks when severe weather puts extra pressure on your roofing system.
Storm-related skylight leaks can worsen quickly if water is left to sit around the opening or spread into nearby roofing materials. Taking action early can help limit interior water damage, protect the surrounding roof structure, and prevent a small leak from turning into a larger repair problem after the storm passes. If left untreated, water intrusion can lead to mold growth, ceiling stains, insulation damage, wood rot, and expensive structural repairs. Acting quickly with a professional inspection and timely repairs can prevent further damage, extend your roof’s lifespan, and save you from costly restoration work. Understanding the common causes of a skylight leaking during storms is the first step toward protecting your home and keeping it dry during every storm.
Why Is Your Skylight Leaking During Storms
In my years on rooftops, I’ve seen hundreds of leaking skylights. The truth? The skylight itself is rarely the problem. It’s almost always the system around it the flashing, sealant, or frame that fails first. Here are the six most common culprits I find on every inspection:
Failed Flashing: Corroded or improperly installed metal flashing lets water seep underneath during heavy rain and wind-driven storms.
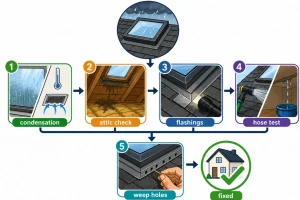
Condensation: Not always a roof leak, warm indoor air hitting a cold glass pane creates moisture that drips like a leak. Easily confused.
Cracked Dome or Glass: Hail, falling branches, or age can crack the glazing itself. Any crack becomes a direct entry point for storm water.
Clogged Weep Holes: Skylights have small drainage holes around the frame. Debris blocks these, causing water to back up and overflow inside.
Damaged Curb or Frame The raised curb the skylight sits on can rot, crack, or shift — especially in older installations with no proper waterproof membrane.
Emergency Stop-Gap Fixes (While It’s Still Raining)
If a storm is raging right now and water is actively coming in, here’s what you can do from inside the house safely to protect your home until the weather clears and proper repairs can be made:
From Inside the Room
- Contain the water immediately. Place buckets, towels, and plastic sheeting under the leak. Protect flooring, electronics, furniture, and other valuables without delay because water damage can spread quickly.
- Apply waterproof tape to the interior frame. Flex Tape or Gorilla Waterproof Tape pressed firmly along interior seams can temporarily slow water infiltration while you wait for the storm to pass. Keep in mind this is only a short-term solution.
- Drill a relief hole (if the ceiling is bulging). If water is pooling in a sagging ceiling bubble, carefully drill a small hole at the lowest point to let it drain in a controlled way. This can help prevent a sudden ceiling collapse that causes more extensive damage.
Safety Warning: Never climb onto the roof during a storm. Wet roofing materials, strong winds, lightning, and poor visibility create extremely dangerous conditions. Wait until the weather is clear and the roof is dry before attempting any exterior inspection or repair. If the leak is severe, contact an emergency roofing professional as soon as it is safe to do so.
How to Prevent Skylight Leaking During Storms 
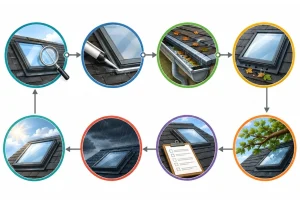
Preventing skylight leaking during storms starts with routine maintenance that protects your roof, skylight, and home from costly water damage.
Inspect the skylight flashing at least once a year to ensure it remains secure, rust-free, properly sealed, and capable of directing rainwater away.
Replace cracked, brittle, or deteriorated sealant as soon as you notice wear to maintain a watertight barrier around the skylight frame.
Clean gutters and downspouts regularly to prevent rainwater from backing up onto the roof and increasing pressure around the skylight area.
Keep weep holes free of leaves, dirt, and debris so trapped water can drain properly instead of overflowing into your home during storms.
Trim overhanging tree branches to reduce falling limbs, leaves, and debris that can damage the skylight or block roof drainage systems.
Schedule a professional roof inspection every year to detect worn flashing, damaged shingles, or hidden leaks before they become expensive repairs.
After every major storm, inspect your roof and skylight for visible damage, helping prevent skylight leaking during storms and future water intrusion.
Permanent Repair Methods 
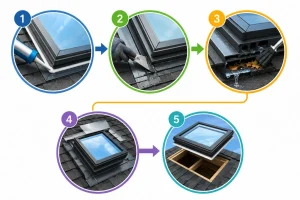
Repair 1: Recaulk the Skylight Frame
Best for: Hairline cracks in sealant along the frame edge.
Remove all old caulk with a caulk remover tool and isopropyl alcohol. Apply a continuous bead of silicone roofing sealant rated for outdoor UV exposure, then smooth it evenly and allow it to cure according to the product instructions before the next rain. This simple repair can help address early-stage leaks and restore a waterproof seal around small gaps caused by sun exposure and seasonal expansion. In the RGV, where intense sun and changing weather can put stress on roofing materials, inspect the surrounding frame carefully before applying new sealant. Hidden cracks, loose materials, or damaged flashing may also require attention to prevent water from finding another entry point.
Repair 2: Rebed and Reseal the Flashing
Best for: Lifted or gapped step flashing or counter-flashing.
Gently lift the flashing edge, clean the surface, apply a layer of roofing cement or butyl tape, then press the flashing back firmly and nail it in place. Cover exposed nail heads with a dab of roofing cement. This is one of the most common skylight repairs and can solve many leaks caused by failing flashing, especially when dealing with a skylight leaking during storms. It also improves long-term durability by reinforcing weak bonding points that often fail during heavy rain. After completing the repair, inspect the surrounding shingles to ensure they overlap correctly and direct rainwater away from the flashing instead of underneath it.
Repair 3: Clear and Rebuild the Weep Channel
Best for: Blocked weep holes with intact flashing.
Clear debris, rinse with water, and confirm free drainage. If the channel is damaged, apply a flexible foam backer rod and reseal with silicone. Keeping these drainage paths open is critical because trapped water pressure can slowly force moisture back into the roof layers and create recurring leaks over time. If you are in Texas, regularly checking the weep holes during seasonal roof maintenance can help prevent leaves, dirt, insects, and other debris from blocking drainage and contributing to future leaks.
Repair 4: Replace the Flashing Entirely
Best for: Severely rusted, cracked, or improperly installed flashing.
This requires removing surrounding shingles, installing new step flashing and counter-flashing, and re-laying the shingles. It is commonly handled by roofing professionals but can be completed by experienced DIY homeowners with the proper tools and safety precautions. This repair fully restores the waterproof barrier and is often the most reliable long-term solution when multiple leak points exist. Using high-quality flashing materials that are compatible with your roofing system can improve durability and reduce the risk of future leaks during severe weather.
Repair 5: Replace the Skylight Unit
Best for: Cracked glass, broken seals in double-pane units, or skylights over 20 years old.
At that point, the cost of repeated repairs often exceeds the cost of installing a quality replacement unit. A full replacement also improves energy efficiency, reduces condensation, enhances weather protection, and ensures the skylight meets modern waterproofing standards for long-term performance. Choosing a modern skylight with factory-designed flashing kits and energy-efficient glazing can provide better insulation, reduce maintenance needs, and offer greater protection against heavy rain and strong winds for years to come.
Tools & Materials You’ll Need
| Item | What It’s For | Difficulty |
| Silicone roofing sealant | Recaulking frame and flashing edges | Easy |
| Roofing cement (asphalt mastic) | Bedding flashing, patching small gaps | Easy |
| Butyl tape (self-adhesive flashing) | Sealing under step flashing | Easy |
| Pry bar & roofing nails | Lifting shingles, re-nailing flashing | Moderate |
| Tin snips & galvanized metal flashing | Fabricating replacement flashing | Moderate |
| Waterproof membrane (e.g. Ice & Water Shield) | Underlayment when replacing full flashing kit | Moderate |
| Replacement skylight unit | When the frame or glazing is beyond repair | Advanced |
When Should You Call a Professional Roofer? 

I’ll be straight with you not every skylight leak is a DIY job. Here’s when you should put the caulk gun down and pick up the phone instead:
- The leak is coming from multiple points around the skylight or appears in different locations each storm this usually means the underlying decking or curb has rotted and needs structural repair.
- You see visible mold or staining in the attic insulation. This means the leak has been ongoing much longer than you realize and the moisture damage needs a full professional assessment.
- The skylight is on a steep pitch or high roof. No repair is worth risking a serious fall. A professional roofer has the safety equipment and experience to work safely in these conditions.
- The skylight is over 15–20 years old. Old units often have discontinued parts. A roofer can assess whether repair or full replacement is the smarter long-term investment.
Frequently Asked Questions
Can I use Flex Seal on a leaking skylight?
Flex Seal and similar spray products are emergency band-aids at best and should never be considered a permanent repair. They break down over time due to constant UV exposure, temperature changes, and heavy rainfall. For a longer-lasting repair, use a high-quality silicone roofing sealant or butyl tape specifically designed for exterior roofing applications. Temporary sprays can also trap moisture beneath the surface, allowing hidden wood rot or mold to develop if the damaged area is not repaired correctly afterward.
How do I know if it’s a roof leak or condensation?
Condensation usually forms on dry, cold days, creating small water droplets or fog directly on the glass surface because of indoor humidity. A true roof leak typically appears only during or shortly after rainfall, with water entering around the skylight frame, flashing, or nearby ceiling drywall instead of the glass itself. Condensation often appears evenly across the pane, while a roof leak generally follows a specific path from the point where water enters the roofing system.
How long does skylight flashing last?
Quality aluminum or copper flashing that is installed correctly can last between 20 and 30 years with regular maintenance. Lower-quality galvanized steel flashing, especially in humid or coastal climates, may begin to rust and fail in as little as 10 to 12 years. If the flashing was installed at the same time as your roof, inspect it after major storms or whenever leaks appear. Routine roof inspections and prompt repairs can significantly extend the lifespan of the flashing system.
My skylight only leaks during very heavy rain or when wind blows from one direction. Why?
This is a common sign of wind-driven rain entering through damaged or poorly sealed flashing on the side of the skylight facing the wind. Strong gusts can force water underneath lifted flashing edges or small gaps that remain sealed during normal rainfall. In most cases, the affected flashing section needs to be repaired or replaced rather than simply recaulked. If ignored, repeated storms can gradually enlarge the opening, resulting in more frequent leaks and increasing the risk of structural water damage.
What Causes Condensation on a Roof?
Roof condensation forms when warm, humid indoor air meets a cold roof surface, causing moisture to collect as water droplets. Poor attic ventilation, inadequate insulation, and high indoor humidity are the most common causes. Everyday activities like cooking, showering, and drying clothes indoors increase moisture levels. If left untreated, condensation can lead to mold growth, wood rot, damaged insulation, and reduced energy efficiency.